
Windows Server Hardening Checklist: 12 Practical Steps
A practical Windows Server hardening checklist: LAPS, password policy, SMB, LLMNR, RDP, firewall, auditing, Defender ASR and TLS, with PowerShell and GPO.
By NetGuardUpdated: 9 min readنسخه فارسی
This Windows Server hardening checklist turns a default Windows Server installation into a configuration that shrinks the attack surface and makes lateral movement much harder. Windows ships for maximum compatibility, not maximum security: LLMNR and NetBIOS are on, auditing is minimal, and admins often share one local administrator password across every server. Below are 12 practical steps with PowerShell commands and GPO paths you can apply today.
Most ransomware intrusions in Windows networks abuse exactly these weaknesses: hash theft via LLMNR poisoning, lateral movement with a shared local admin password, and exposed RDP. Hardening closes those paths one by one.
Before you start hardening Windows Server
- Pick a baseline: the Level 1 profile of the CIS Benchmark for your exact version (2019, 2022 or 2025) and the Microsoft Security Baseline from the Security Compliance Toolkit are the two main references. Keep Domain Controller and Member Server profiles separate.
- Know each server's role: file, web, database and domain controller servers have different needs.
- Prefer Server Core: the installation without a desktop has fewer components, which means a smaller attack surface and fewer patches.
- Enforce with GPO, not by hand: manual settings drift. The PowerShell in this article is for testing and standalone servers.
- Test first: try every change on a lab server or a small OU.
The Windows Server hardening checklist at a glance
| Area | Key action | How to enforce |
|---|---|---|
| Accounts | Windows LAPS, Guest disabled | GPO, LAPS module |
| Passwords | 14+ characters, lockout after 5 attempts | Default Domain Policy |
| SMB | Remove SMBv1, require SMB signing | GPO, PowerShell |
| Name resolution | LLMNR, NetBIOS and NTLMv1 off | GPO |
| RDP | NLA, source address restriction | GPO, firewall |
| Firewall | On in all profiles, inbound blocked | GPO, PowerShell |
| Auditing | Advanced Audit Policy, log forwarding | GPO, auditpol |
| Defender | Real-time, tamper protection, ASR | Intune, GPO, PowerShell |
| Services | Disable Print Spooler and unused roles | GPO, PowerShell |
| TLS | Disable SSL 3.0, TLS 1.0 and 1.1 | SCHANNEL registry |
| Patching | Monthly cumulative updates | WSUS, Configuration Manager |
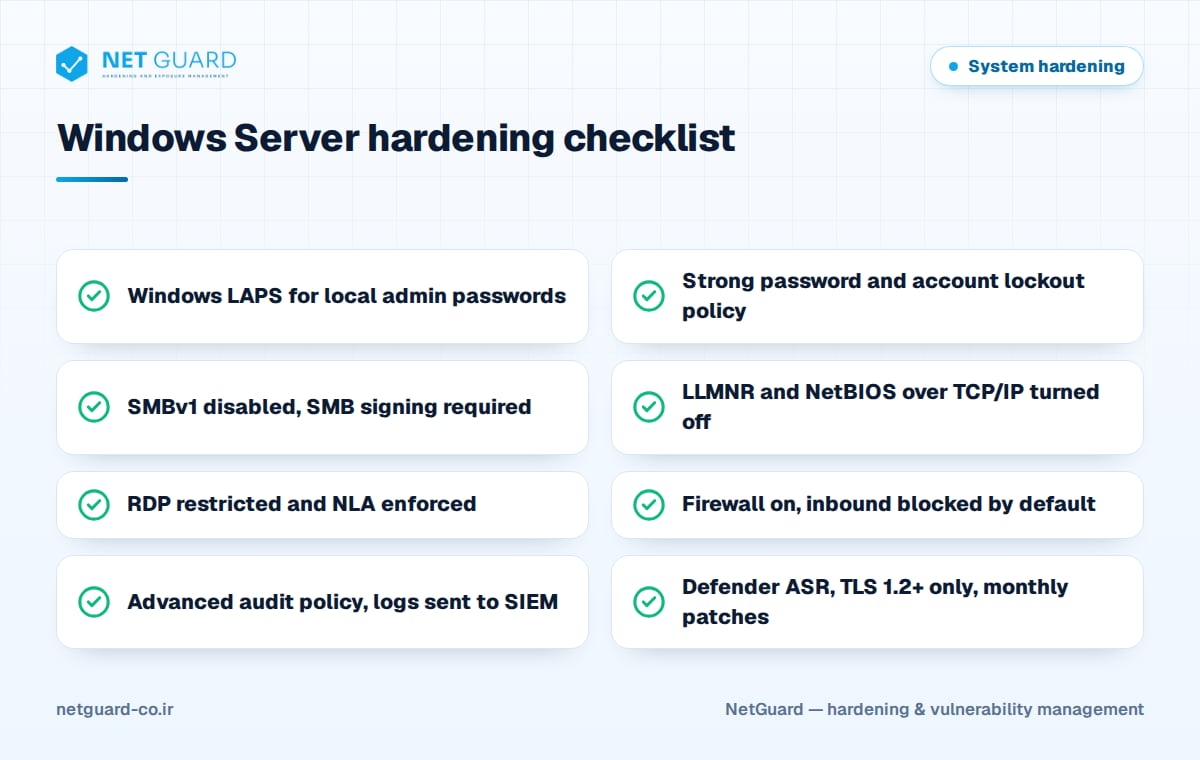
Steps 1–2: accounts, LAPS and password policy
Local administrator and Windows LAPS
If every server shares the same local administrator password, compromising one means compromising all. Windows LAPS gives each server a unique random password, rotates it and stores it in Active Directory or Entra ID. Windows LAPS is built into Windows Server 2019 and later (with the April 2023 updates or newer).
Import-Module LAPS
Update-LapsADSchema
Set-LapsADComputerSelfPermission -Identity "OU=Servers,DC=corp,DC=local"
# After enabling the LAPS GPO settings for that OU:
Get-LapsADPassword -Identity "SRV-APP01" -AsPlainText
Disable-LocalUser -Name "Guest"
Domain Admins should never log on to member servers or workstations. Tiered administration and the Protected Users group are covered in our Active Directory hardening guide.
Password and account lockout policy
These values align with common CIS recommendations; check them against your benchmark version:
Set-ADDefaultDomainPasswordPolicy -Identity "corp.local" -MinPasswordLength 14 -PasswordHistoryCount 24 -ComplexityEnabled $true -LockoutThreshold 5 -LockoutDuration "00:15:00" -LockoutObservationWindow "00:15:00"
# Standalone (non-domain) server:
net accounts /minpwlen:14 /uniquepw:24 /lockoutthreshold:5 /lockoutduration:15 /lockoutwindow:15
Use group Managed Service Accounts (gMSA) for services so their passwords are long and rotated automatically.
Steps 3–7: protocols, RDP and firewall
Steps 3–4: remove SMBv1 and require SMB signing
SMBv1 is a legacy protocol abused by well-known malware such as WannaCry. SMB signing blocks NTLM relay attacks over SMB.
Get-SmbServerConfiguration | Select-Object EnableSMB1Protocol, RequireSecuritySignature
Set-SmbServerConfiguration -EnableSMB1Protocol $false -Force
Uninstall-WindowsFeature -Name FS-SMB1   # restart required
Set-SmbServerConfiguration -RequireSecuritySignature $true -Force
Set-SmbClientConfiguration -RequireSecuritySignature $true -Force
In GPO, under Security Settings > Local Policies > Security Options, enable "Microsoft network server: Digitally sign communications (always)" and "Microsoft network client: Digitally sign communications (always)".
Step 5: turn off LLMNR, NetBIOS and NTLMv1
LLMNR and NetBIOS Name Service let tools such as Responder answer name queries with spoofed replies and capture password hashes. Disable LLMNR via GPO at Administrative Templates > Network > DNS Client by setting "Turn off multicast name resolution" to Enabled. Disable NetBIOS over TCP/IP on network adapters:
Get-CimInstance -ClassName Win32_NetworkAdapterConfiguration -Filter "IPEnabled = TRUE" |
  Invoke-CimMethod -MethodName SetTcpipNetbios -Arguments @{ TcpipNetbiosOptions = [uint32]2 }
Also set "Network security: LAN Manager authentication level" to "Send NTLMv2 response only. Refuse LM & NTLM".
Step 6: restrict RDP and enforce NLA
Never expose RDP directly to the internet; use a VPN, a jump server or RD Gateway. Enforce NLA via GPO at Remote Desktop Session Host > Security with "Require user authentication for remote connections by using Network Level Authentication", and grant RDP logon rights only to a dedicated admin group.
Set-ItemProperty -Path 'HKLM:\SYSTEM\CurrentControlSet\Control\Terminal Server\WinStations\RDP-Tcp' -Name 'UserAuthentication' -Value 1
New-NetFirewallRule -DisplayName 'RDP - admin subnet only' -Direction Inbound -Protocol TCP -LocalPort 3389 -RemoteAddress 10.10.50.0/24 -Action Allow
Disable-NetFirewallRule -DisplayGroup 'Remote Desktop'
Warning: if you are connected from outside the admin subnet, the last line will lock you out.
Step 7: Windows Defender Firewall
The firewall should be on in the Domain, Private and Public profiles, block inbound traffic by default and only allow the ports the server role needs:
Set-NetFirewallProfile -Profile Domain,Private,Public -Enabled True -DefaultInboundAction Block -DefaultOutboundAction Allow -LogBlocked True -LogMaxSizeKilobytes 16384
Get-NetFirewallProfile | Select-Object Name, Enabled, DefaultInboundAction, LogBlocked
Step 8: audit policy and logging
Without proper auditing, detecting an intrusion is close to impossible. Configure Advanced Audit Policy under Security Settings > Advanced Audit Policy Configuration and enable "Audit: Force audit policy subcategory settings" so legacy category settings do not override it. To test on a single server:
auditpol /set /subcategory:"Credential Validation" /success:enable /failure:enable
auditpol /set /subcategory:"Logon" /success:enable /failure:enable
auditpol /set /subcategory:"Special Logon" /success:enable
auditpol /set /subcategory:"User Account Management" /success:enable /failure:enable
auditpol /set /subcategory:"Security Group Management" /success:enable
auditpol /set /subcategory:"Process Creation" /success:enable
auditpol /get /category:*
wevtutil sl Security /ms:1073741824
Also enable "Include command line in process creation events" and "Turn on PowerShell Script Block Logging", and forward logs to a central store with Windows Event Forwarding or your SIEM agent. Key events to watch:
| Event ID | Meaning |
|---|---|
| 4624 / 4625 | Successful / failed logon |
| 4672 | Special privileges assigned to new logon |
| 4720 | User account created |
| 4728 / 4732 | Member added to a security group |
| 4740 | Account locked out |
| 4688 | New process created |
| 1102 | Security log cleared |
Steps 9–10: Defender, ASR and unnecessary services
Step 9: Microsoft Defender and ASR rules
Real-time protection and tamper protection must be on. Attack Surface Reduction (ASR) rules block common malware behaviors; run them in audit mode first, review event 1122 in the Microsoft-Windows-Windows Defender/Operational log, then switch to Enabled. ASR support depends on your Windows Server version.
Get-MpComputerStatus | Select-Object AMServiceEnabled, RealTimeProtectionEnabled, IsTamperProtected
Set-MpPreference -PUAProtection Enabled
# ASR: block credential stealing from LSASS (audit first)
Add-MpPreference -AttackSurfaceReductionRules_Ids 9e6c4e1f-7d60-472f-ba1a-a39ef669e4b2 -AttackSurfaceReductionRules_Actions AuditMode
Enabling LSA Protection and Credential Guard further hardens credentials in memory.
Step 10: unused services and roles
Remove or disable every role and service you do not use. The classic example is Print Spooler on servers that do not print, especially domain controllers:
Get-WindowsFeature | Where-Object Installed
Stop-Service -Name Spooler -Force
Set-Service -Name Spooler -StartupType Disabled
Steps 11–12: TLS and updates
Step 11: disable SSL 3.0, TLS 1.0 and TLS 1.1
Keep only TLS 1.2 and, on newer versions, TLS 1.3. Confirm that legacy applications and clients support TLS 1.2 first, and check SchUseStrongCrypto for .NET Framework apps. A reboot is required.
$base = 'HKLM:\SYSTEM\CurrentControlSet\Control\SecurityProviders\SCHANNEL\Protocols'
foreach ($p in 'SSL 3.0','TLS 1.0','TLS 1.1') {
  foreach ($side in 'Server','Client') {
    $key = "$base\$p\$side"
    if (-not (Test-Path $key)) { New-Item -Path $key -Force | Out-Null }
    New-ItemProperty -Path $key -Name 'Enabled' -Value 0 -PropertyType DWord -Force | Out-Null
    New-ItemProperty -Path $key -Name 'DisabledByDefault' -Value 1 -PropertyType DWord -Force | Out-Null
  }
}
Step 12: patch on a schedule
Microsoft usually releases security updates on the second Tuesday of each month (Patch Tuesday). Use WSUS or Configuration Manager to deploy to a pilot group first, then to the rest, and prioritize vulnerabilities listed in the CISA KEV catalog. See our patch management guide for the full process.
How NetGuard helps
NetGuard runs authenticated scans that audit Windows servers against CIS Benchmarks and your custom baseline, from SMBv1 and SMB signing to audit policy and TLS protocols. Configuration drift is flagged after every scan, missing patches are prioritized using exploit intelligence and asset criticality, and rescans verify each fix. See the NetGuard hardening audit page for details.
Frequently asked questions
What is Windows Server hardening?
Windows Server hardening is the process of changing default Windows Server settings to reduce the attack surface: removing SMBv1, turning off LLMNR, enforcing NLA for RDP, enabling the firewall and audit policy, deploying LAPS and disabling unused services. It is usually based on a CIS Benchmark or the Microsoft Security Baseline and enforced across servers with Group Policy.
Which baseline is best for Windows Server hardening?
The most common reference is the Level 1 profile of the CIS Benchmark for your exact Windows Server version, which has separate Domain Controller and Member Server profiles. The Microsoft Security Baseline is Microsoft's official recommendation and ships as ready-made GPOs in the Security Compliance Toolkit. Many organizations combine the two into one internal baseline.
Will disabling SMBv1 break anything?
In most environments, no, because supported Windows versions use SMBv2 and SMBv3. Problems usually appear with very old devices such as some printers, NAS appliances or obsolete operating systems. Before removing it, you can enable SMBv1 access auditing on your servers to identify which devices still depend on the protocol and plan replacements.
What is LAPS and why does it matter?
LAPS is Microsoft's solution for managing local administrator passwords. It sets a unique random password on each server, rotates it regularly and stores it in Active Directory or Entra ID. This stops lateral movement with a shared password: if an attacker compromises one server, the local admin password they steal does not work anywhere else.
How do I verify Windows Server hardening?
Audit the configuration against your baseline. CIS-compatible tools run authenticated checks and report a compliance percentage plus a list of failed settings. Built-in tools such as gpresult and auditpol help with spot checks. Repeat the audit on a schedule so configuration drift is detected quickly, and rescan after every fix to confirm it worked.
- #Windows Server hardening checklist
- #Windows Server hardening
- #harden Windows Server 2022
- #Windows security baseline
- #CIS Windows Server
- #PowerShell hardening